Simplifying W-9 Tax Forms for Salesforce

Hawk-eye editor with a passion for trailblazing Salesforce experiences
What is a W-9 Tax Form?
A W-9 Tax Form, fulfilling the w-9 tax form purpose, is a US document filled in by self-employed individuals and entities such as consultants and contractors, typically those acting as a w9 tax form independent contractor. In this instance, the requester of the W-9 form is usually the person who hires them! These forms need to be filled in to comply with US tax regulations and the IRS. In this form, the requester collects important details such as the Taxpayer Identification Number and Social Security Number of the employee. While W-9 forms are a requirement for countless business transactions, filling them out can be complicated and time-consuming!
Fillable W-9 Form: What Does a W-9 Form Look Like?
The first page of the W-9 Form is where details are inputted while the other six pages explain how to fill out w9. The first and second lines require that you fill in the name of the entity or individual and the name of their business. It is important that in section three that the customer specifies the type of entity they are. Multiple checkboxes are provided including C Corporation, S Corporation, Partnership, and so on. When the LLC option is checked, the customer must ensure that they stipulate the type of LLC. It is also possible for the customer to mark themselves as “Other” in the free text space. In section four, customers can add their exemption codes if applicable.
In sections five, six, and seven, the customer is required to enter their address, City, State, and ZIP Code, as well as list relevant account numbers. There is also a non-mandatory option for the form filler to add the address and details of the entity requesting the W-9 Form.

One of the most challenging aspects of the W-9 Tax Form is collecting both the Social Security number and Employer Identification number of the customer in Part I. This is because these numbers must display in the required format when completed:

Finally, in Part II, the form filler needs to sign and certify the W-9 document and enter the date of signing.

Integrating a W-9 Tax Form with Salesforce
So you have a W9 Tax Form that you’d like to integrate with Salesforce? This might seem like a no-brainer given the power of Salesforce to automate difficult business processes while remaining fully secure and compliant. Unfortunately, Salesforce does not have robust document generation capabilities and it has no native e-signing solution. This means that to connect your W-9 form to Salesforce, you either need to implement custom development or invest in a trusted third-party tool on the AppExchange. Here’s how Salesforce partner, Titan, can get the job done.
First, we will look at the biggest challenges of this use case and then explain the Titan solution:
Biggest Challenges with W-9 Tax Forms + Salesforce
Titan Achieves Seamless Integration between W-9 Tax Forms and Salesforce:
Making the W-9 Public on Your Website
Using Titan, you can make the W-9 Form public on your website so that any contractor or vendor can simply download it and fill it in. How does this work?
Once the form is ready, you will click publish in Titan and this will give you the URL which is publicly available and can be embedded into your website:
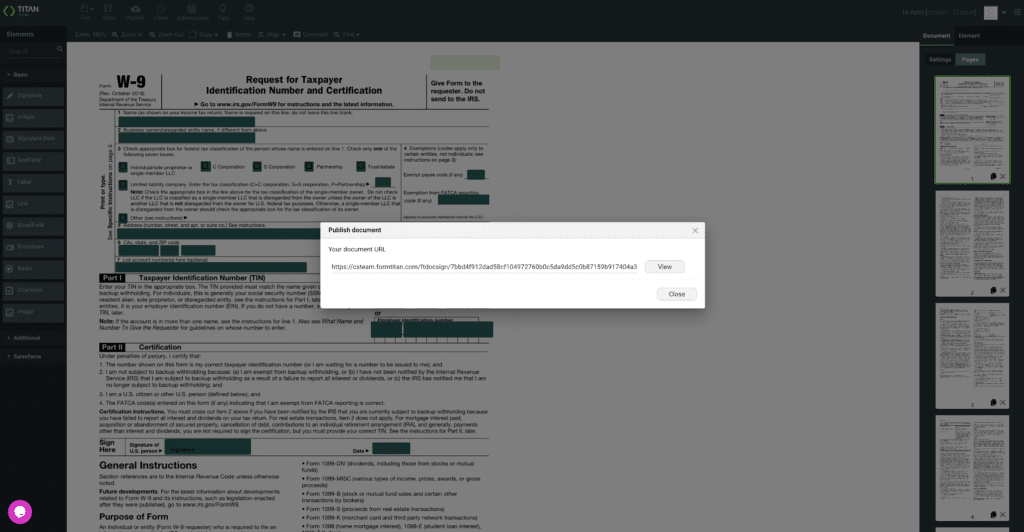
For example, you can embed the URL into a button that takes you straight to the W-9 Form.

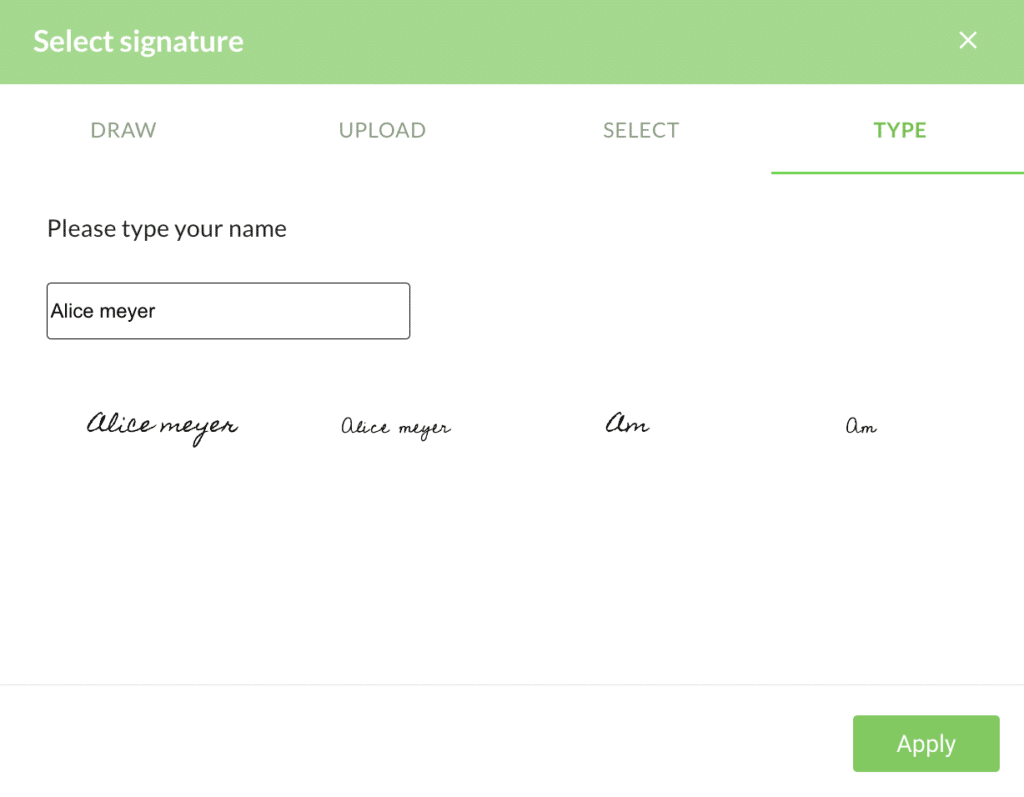
Conditional logic is set up to make it easy and simple for the user to fill in. After the user has entered all relevant details including their Social Security and Employer Identification details, they can sign the document. It is possible to sign via drawing, uploading, selecting, or typing a signature:
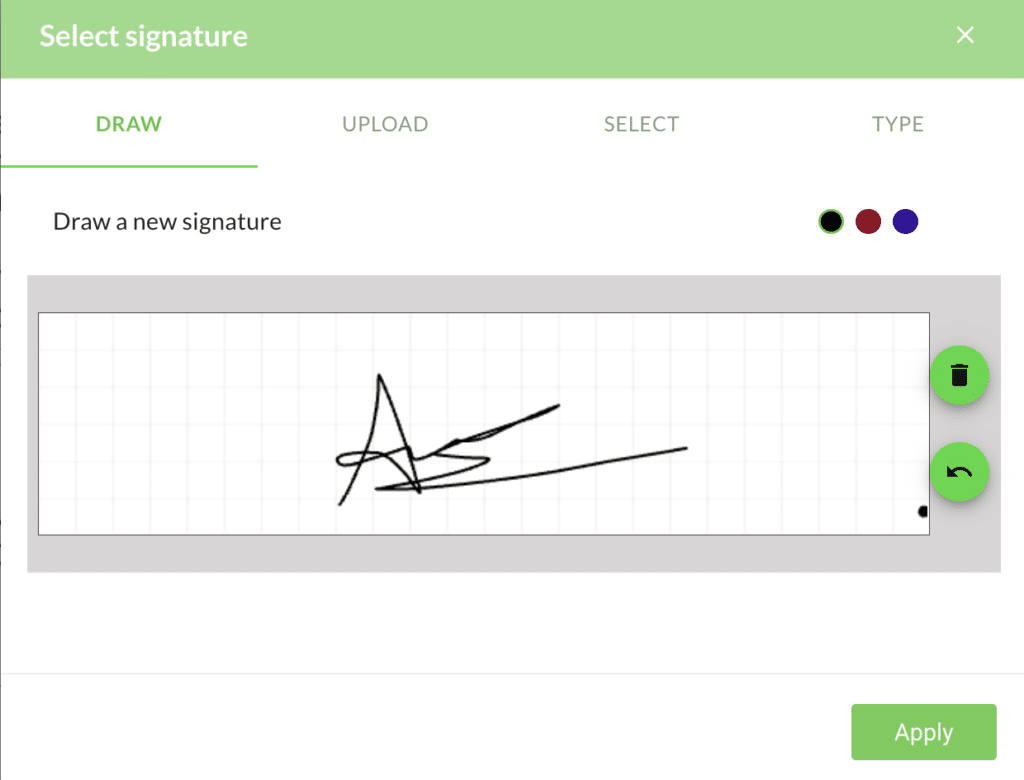
Once the document is signed, a record will be created in Salesforce. This creates an account and a contact linked to the account. All relevant information is captured here such as entity type and address. The signed W-9 Form will be attached to the record. This is the power of doing it externally with Titan using zero code.
Send out the W-9 Via Salesforce
This method of managing W-9 forms enables you to send them out internally at the click of a button. And this is all tracked for you in Salesforce. To implement this you first need to create a record in Salesforce, ensuring your relevant contact is created:
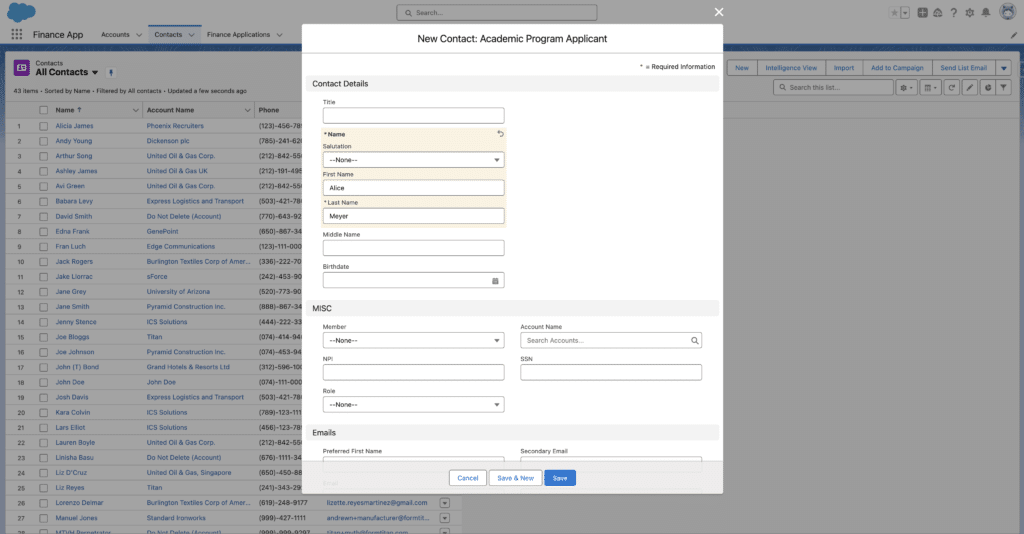
After clicking save, you will have access to Titan’s easy document generation button. After clicking this button, you will see a list of documents available. One will be the Request for Taxpayer W-9. As you click this document, it will be sent to the email of the contact you created.
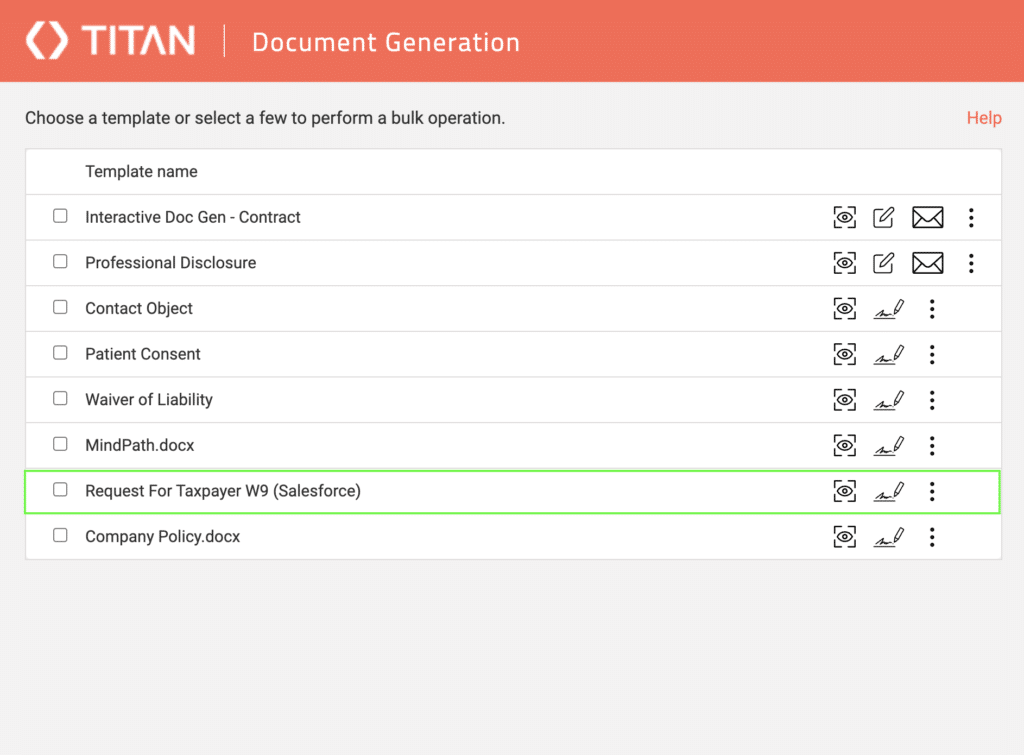
Inside Titan, sending this document will create a record tracking for you called Titan Sign Tracking. Here, you can view the status of the document and be notified when the document is sent, viewed, and completed. You will get this insight in real time. As with making the W-9 Form public, this option of sending it out internally is easy to fill and complete. In fact, it is even easier! This is because information can be pre-filled and when the signing stage is reached, signatures can be available for pre-selection!
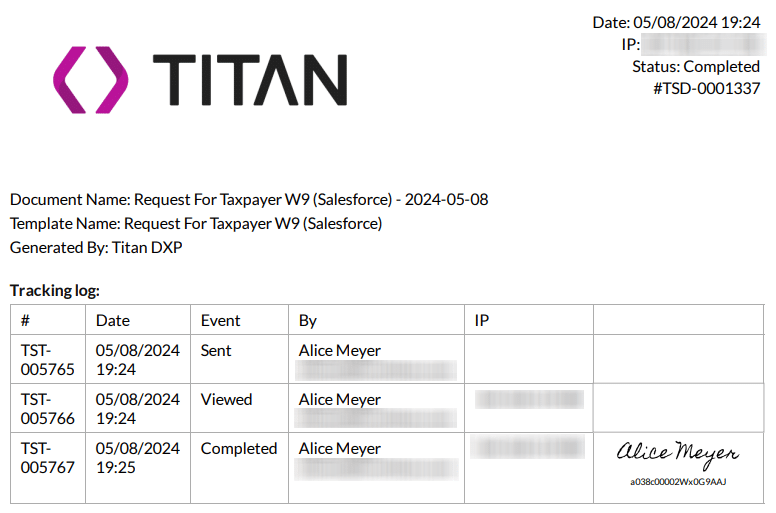
Once completed, this will show up on the Titan tracking log and also on the Salesforce record. Attached to the record you will also see the signed W-9 Form as well as a tracking log including information such as dates and IP addresses.
The Power of Titan for Streamlining W-9 Forms for Salesforce
We hope you enjoyed this article and learned how to integrate your W-9 Forms with Salesforce using zero code! Keep following us for tips and tricks on how to solve Salesforce’s toughest use cases.
Let’s get started!

Disclaimer: The comparisons listed in this article are based on information provided by the companies online and online reviews from users. If you found a mistake, please contact us.
Do you like Titan’s Use Case?
Don’t miss out on Salesforce solutions. Schedule a demo to get started with Titan today!

