Getting Started with Titan for Salesforce: How to Create a New Project?

Hawk-eye editor with a passion for trailblazing Salesforce experiences
Are you ready to create a new project from forms and documents to contracts, landing pages, and much more in Titan for Salesforce?
Our solutions use a no-code drag-and-drop builder allowing users to get their first Project up and running in minutes with minimal clicks.
You get a whole host of solutions for DocGen, web portals, and applications that integrate seamlessly with Salesforce in real-time to ensure that customer data is accurate.
Let us get started.
Are there any Prerequisites?
You will need a registered Titan Account in Free, Teams, and Business Pro packages.
What steps should I follow?
To begin, sign into your Titan Account.
On your Titan Dashboard, click on New Project.

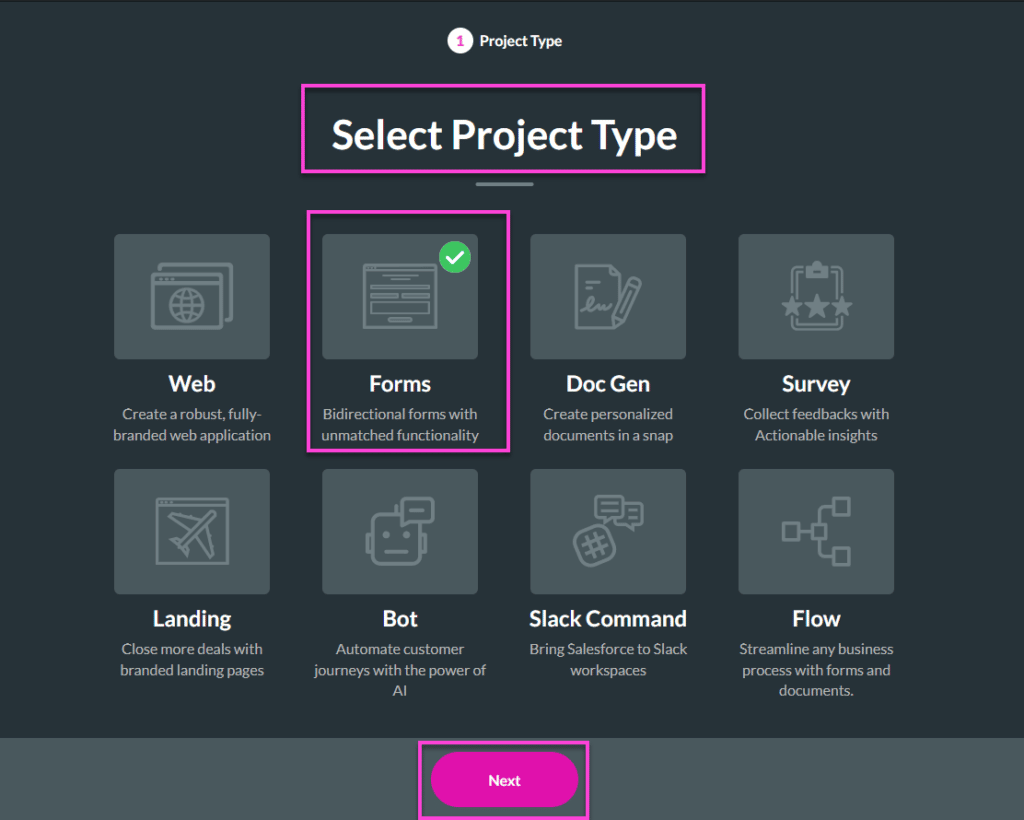
Before you begin creating your Project, choose the Project Type. You can choose the following:
- Web
- Forms
- DocGen
- Landing, and more
Note: All Titan Forms’ functionalities, plus more exciting forms features, are now available on Titan Forms 2.0. This does mean that Titan Forms 1.0 is retiring. Please read the Titan Forms for Salesforce: Version Upgrade article to learn more.

Select Forms 2.0 and click on Next to continue.
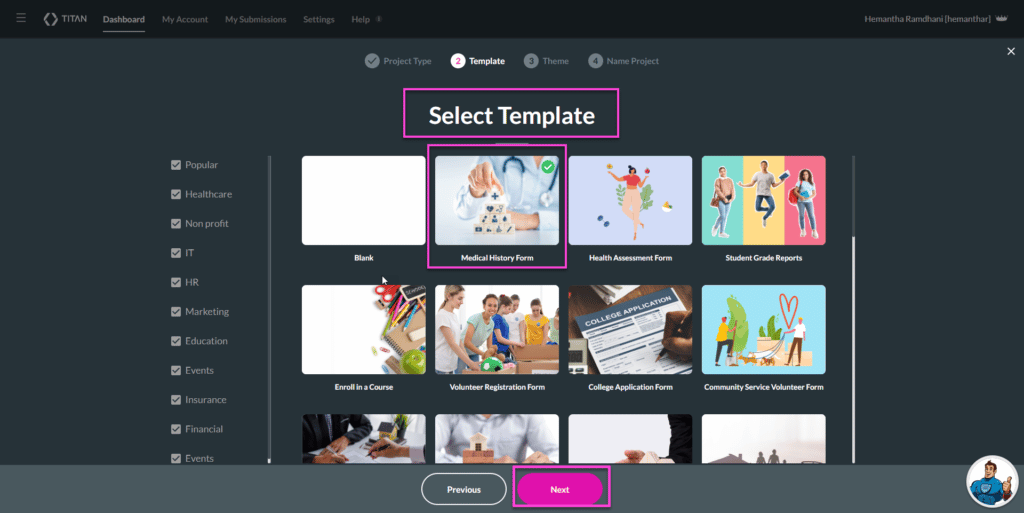
You then have the option to Select a Template. Choose from the many options provided, from a Blank template to a customized Healthcare Forms template, and click on Next.
To create a Theme, navigate to the Select Theme tab. Select the Theme and click on Next.

Let’s dive into giving your Project a Name – enter the name of your Project, and Let’s go!

And, there you have it – your template is ready to be customized.
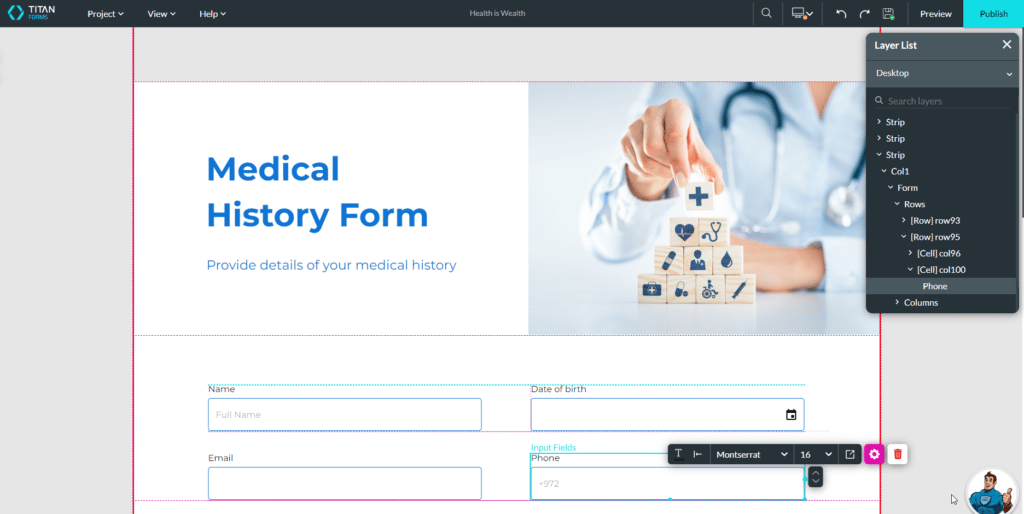
Note: Use our drag-and-drop form builder to pull fields from the menu on the left onto your form. You can also enable security features and add user access permissions to the form.
If you’re happy with your Project, it’s time to save! Click on Save, and Publish the Project.

Congratulations on setting up your New Project in Titan!
For a more in-depth discussion on creating a stylish web project, refer to our Create Stylish Salesforce Web Projects webinar.
With Titan, you can automatically generate any form you want; all data is fed live from Salesforce. Once your form is filled in, the information is synched with all your relevant Salesforce records.
The Takeaway
Want more information on the steps covered in this article? Book a demo with one of Titan’s consultants today, and find out why Titan is the #1 powerful no-code digital platform for Salesforce.
Tell us about your experience in creating your first Project in Titan in the comments section below!
Take some time and explore Titan in detail by checking us out below. We are just a click away:

Do you like this Titan Guide?
Contact us today to uncover more tips on getting started with Titan!

