How can we help you?
Customers may have multiple Salesforce environments, such as development, testing, or production. Synchronize between different Salesforce and Titan Environments. Export a project or folder to another environment for greater flexibility.
Read more about exporting multiple projects or folders.
Learn how to import a project.
Learn how exporting a project can be tracked using the version functionality.
Note:
You can also export a project from within the project itself, for instance:


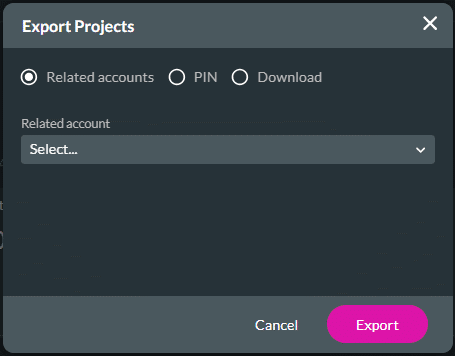
This is the default option. Projects, as well as folders, can be exported to a related account.
| Titan Product | Export Projects screen |
|---|---|
| Web Survey |
1. Click the checkbox if you want to remove the existing project from your projects. The project will be exported, and a new version will be created. 2. Click the Export button.
|
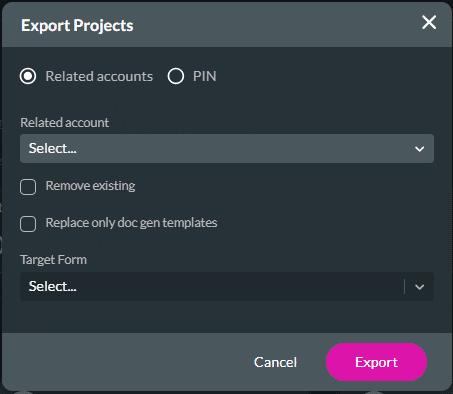
| Forms | 1. Click the checkbox if you want to remove the existing project from your projects. The project will be exported, and a new version will be created. 2. Click the checkbox if you want to replace only the Doc Gen templates and then select the target form from the drop-down list. 3. Click the Export button.
|
| Docs CLM |
1. Click the Export button.
|
| Flow | 1. Click the checkbox if you want to update the project in the target environment. All the mapping in the Flow project will be exported to the target environment. Note: If you don’t want to update the project in the target environment and therefore don’t click the checkbox, but the Export ID already exists, a new project with a unique Export ID will be created in the target environment. 2. Click the Export button.
Note:
2. If the project in the target environment doesn’t have the same Export ID, it will not be overwritten and a new project with a unique Export ID will be created.
|
Projects and folders can be exported using a PIN.
Note:
Prerequisite:
To find the PIN, access the Account Settings of the target environment and copy the code.
Titan Dashboard > Settings > Account Settings > Generate PIN > Copy Code

| Titan Product | Export screen |
|---|---|
| Web Survey |
1. Paste the PIN in the field. 2. Click the checkbox if you want to remove the existing project from your projects. The project will be exported, and a new version will be created. 3. Click the Export button.
|
| Forms | 1. Paste the PIN in the field. 2. Click the checkbox if you want to remove the existing project from your projects. The project will be exported, and a new version will be created. 3. Click the checkbox if you want to replace only the Doc Gen templates and then select the target form from the drop-down list. 4. Click the Export button.
|
| Docs CLM |
1. Paste the PIN in the field. 2. Click the Export button.
|
| Flow | 1. Paste the PIN in the field. 2. Click the checkbox if you want to update the project in the target environment. The project will be exported, and the version in the target environment will be replaced. Note: If you don’t want to update the project in the target environment and therefore don’t click the checkbox, but the Export ID already exists, a new project with a unique Export ID will be created in the target environment. 3. Click the Export button.
Note:
2. If the project in the target environment doesn’t have the same Export ID, it will not be overwritten and a new project with a unique Export ID will be created.
|
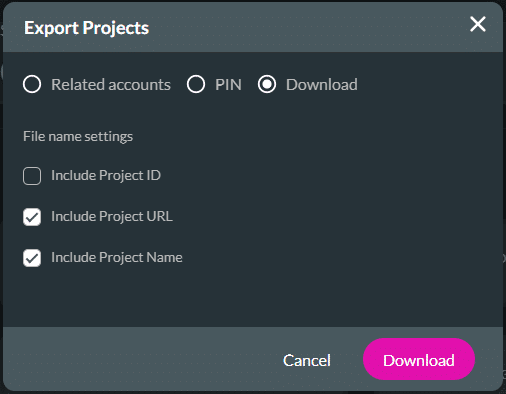
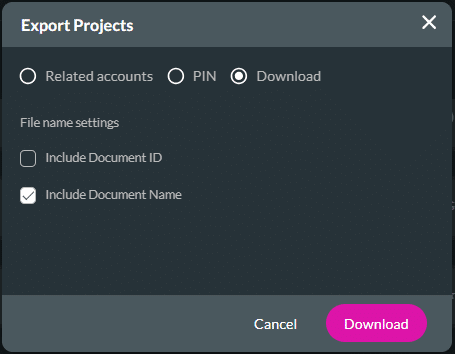
This option is only applicable to projects.
| Titan Product | Export screen |
|---|---|
| Web Survey |
1. Click the File name settings checkboxes as required:
2. Click the Export button. The project is downloaded to a zip file that you can store where it is convenient for you, for instance, locally on your computer or on GIT. |
| Forms | Titan Forms projects cannot be downloaded. |
| Docs CLM |
1. Click the File name settings checkboxes as required:
2. Click the Export button. The project is downloaded to a zip file that you can store where it is convenient for you, for instance, locally on your computer or on GIT. |
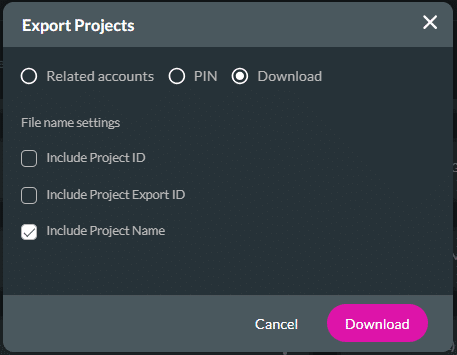
| Flow | 1. Click the File name settings checkboxes as required. Note: These checkboxes determine the file name only and not what is included in the downloaded file.
2. Click the Export button. The project is downloaded to a zip file that you can store where it is convenient for you, for instance, locally on your computer or on GIT. |
You can import the downloaded zip file.

Note:
When you import a Titan Flow project and there is already a Flow project with the same Export ID, the imported project will generate a new unique Export ID and the imported project is not affected.
The functionality works similarly in both Titan products. In this example, a Web project is used.
You can export the project from one environment to another environment where there is already a version of the project. For instance, a project was exported from the sandbox environment to the production environment. Changes were made in the sandbox environment, and the project was exported again using the Remove existing option. The project will be exported, the existing version will be removed, and a new version will be created.


In the example below, the following occurred:
Any of the versions can be opened, viewed, or used. Learn more about the version functionality.