How can we help you?
The Login and Conditions steps determine who can sign in to your Titan Web project. First, SmartV uses information entered on the login page to find a matching record in Salesforce. It can then check that record against optional conditions before allowing the user to continue.
For example, you can match a customer to a Salesforce Contact record using an email address and customer number, then permit access only when the Contact’s Status is Active.
This setup also determines which Salesforce value SmartV returns to the project after a successful login. Returning the record ID gives later project actions a reliable way to retrieve, update, or create data related to the logged-in user.
Make sure you have:
Avoid relying on a field that frequently contains duplicate values. If several records share the same email address, for example, add another identifying field so SmartV can find the correct record.
When a user submits the generated login page, SmartV:
The Login settings identify the Salesforce record. Conditions determine whether that matching record is allowed to continue. A matching email address or other identifier does not override the configured conditions.
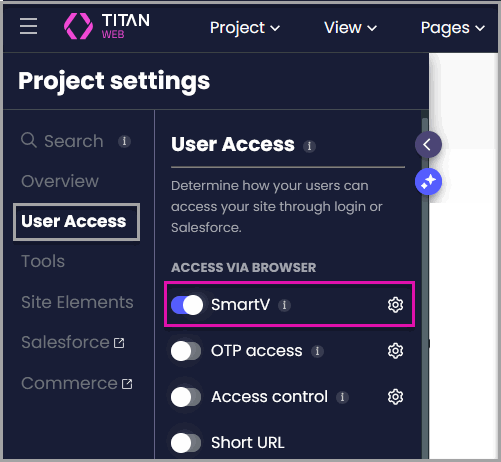
The SmartV configuration opens on the Login step. If SmartV is already enabled, open its configuration to review or edit the existing setup.
You can select a standard object, such as Contact, or a custom Salesforce object. The selected object becomes the source SmartV searches when a user submits the login form. It also determines which fields are available in the Login and Conditions steps.
For example, select Contact if each customer or portal user is represented by a Contact record in Salesforce.
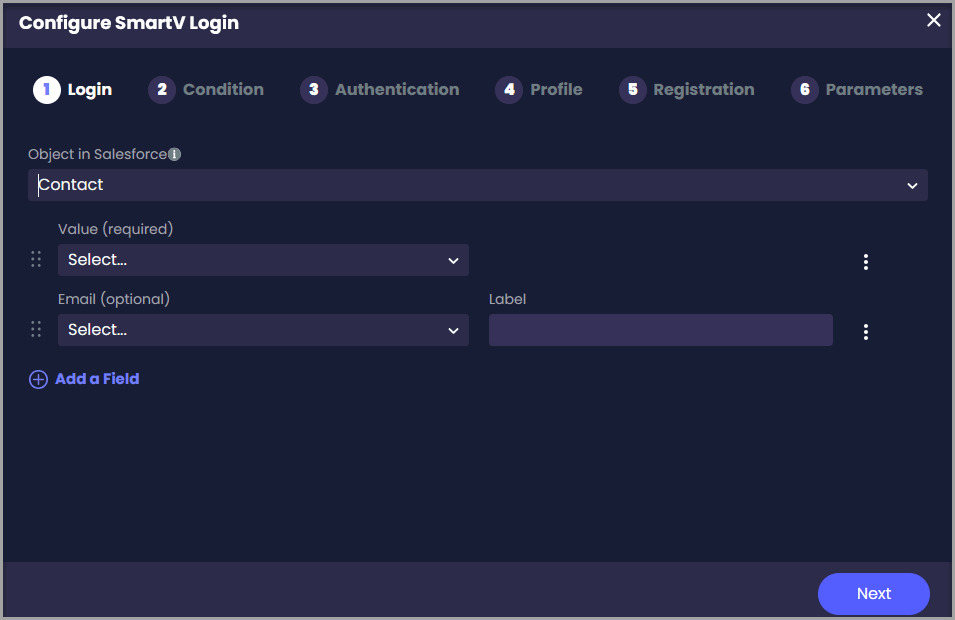
Note: A single Login configuration searches for a single Salesforce object. Choose the object that all users intend to access the project.
In most cases, select the record ID, such as Contact ID. A record ID uniquely identifies the logged-in Salesforce record and provides a reliable reference for later Salesforce Get, Push, and related-record actions.
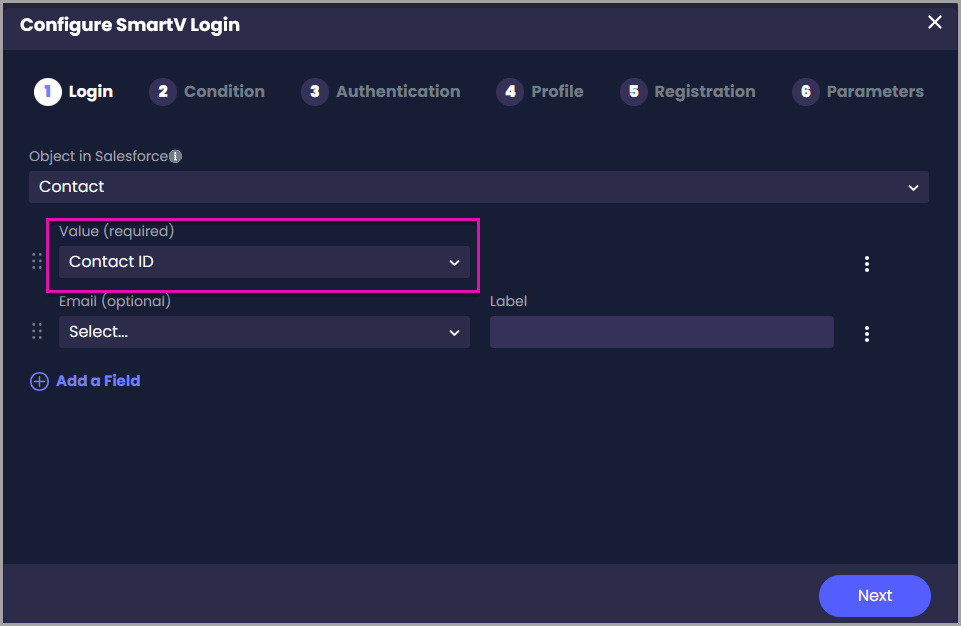
The Value field does not specify what the user enters on the login page. It specifies what SmartV retains from the matching record after a successful login.
When the generated login page is used, SmartV compares the user-entered email address with the value stored in this Salesforce field.
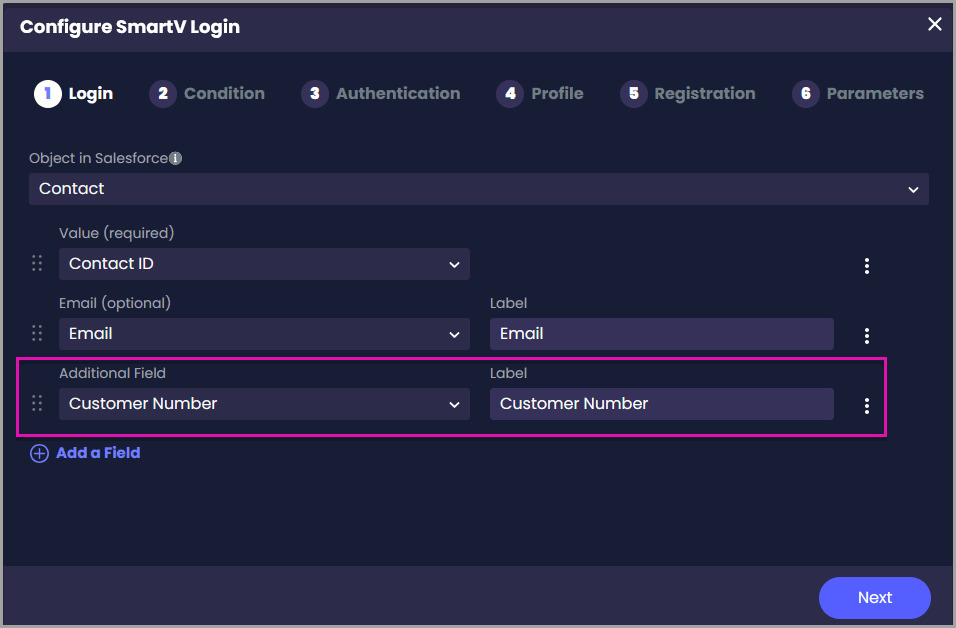
The Email field is optional. SmartV requires at least one login field to identify the user. This can be an email field, another identifying field, or a combination of fields.
If users should sign in without an email address, leave the Email field blank and add the identifier they will use, such as a customer number, membership number, employee number, or account reference.
Note: Leaving the Email field blank does not prevent you from using email-based two-factor authentication. You can select the Salesforce field that should receive the verification code in the Authentication step.
Add another field when a single value may not uniquely identify a Salesforce record, or when your login process requires more than one piece of information.
For example, you can add Customer Number to distinguish between records that share an email address. If the login page contains Email and Customer Number, both values must match the same Salesforce record.
Additional fields can reduce ambiguous matches, but they also add work for the user. Only request the information needed to identify the correct record.
Password Mode hides the characters entered into an additional login field. Use it when a value should not remain visible on the screen.
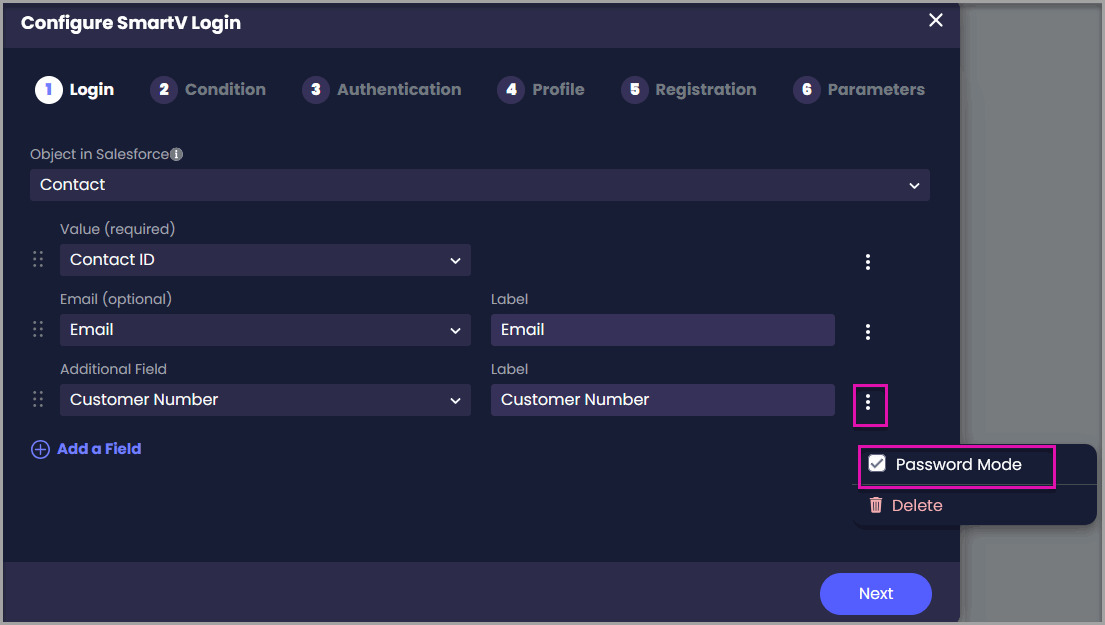
When the user types in the field, the characters appear as dots.
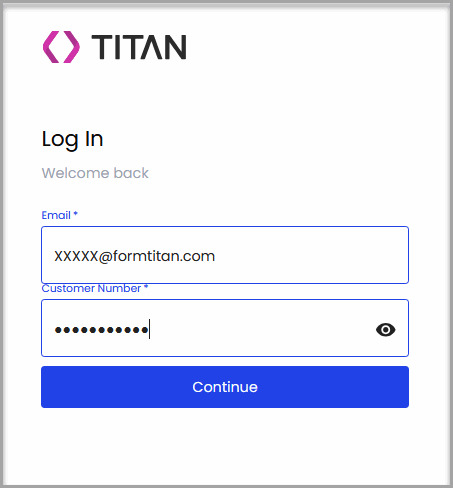
Note: Password Mode only masks the characters displayed on the page. It does not create a password or change how SmartV compares the entered value with Salesforce.
Review the Login settings, then select Next to proceed to the Conditions screen.
Adding a condition is optional. If every Salesforce record that matches the configured login fields should be allowed to continue, leave this screen empty and select Next.
Use conditions when the selected Salesforce object contains matching records that should not all have access to the project. You can restrict access based on a user’s status, role, account, record type, department, region, or another field on the selected object.
For example, a Contact object may contain active customers, vendors, former customers, and inactive contacts. A condition can permit access only when Status equals Active.
Choose a field that clearly indicates whether the matching record should receive access. For example, select Account Role if only contacts with an assigned account role should be allowed to continue.
The available fields are determined by the object selected in the Login step. If the required field is not listed, return to the Login settings and confirm that you selected the correct object.
The available operations depend on the selected field. Select an operation based on the Salesforce field’s data type and the access rule. For example, use Equals or Contains to evaluate text values, and Greater Than or Less Than to evaluate numeric values.
Choose the operator that matches the access rule. For example, use Equals when the field must match a specific value before the user can sign in.
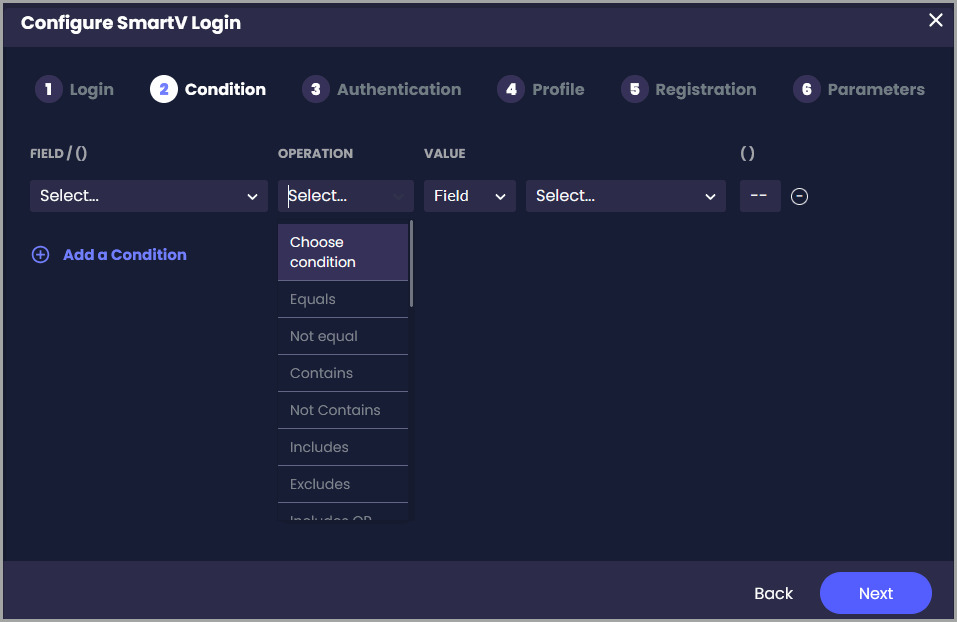
Select the source SmartV should use for the comparison:
| Option | When to Use It | Example |
|---|---|---|
| Static | Compare the Salesforce field with a value you enter. | Check whether Status equals Active. |
| Field | Compare the selected field with an available field-based value. | Evaluate the selected field against another supported field value. |
The options displayed next depend on the selected field and operator.
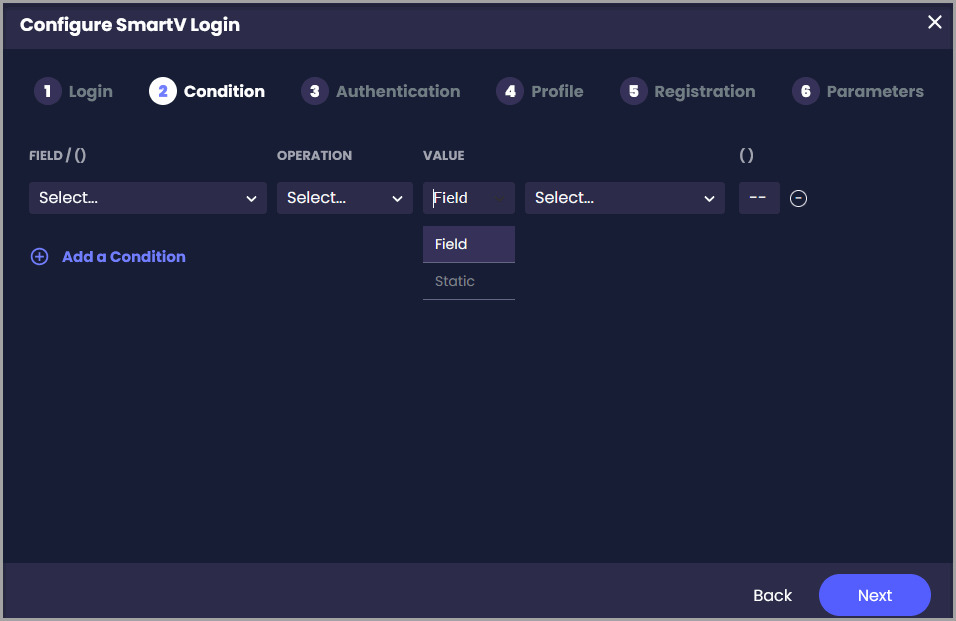
For example:
Only users whose matching Salesforce record has an Active status can continue. Enter the value as it is stored in Salesforce. Different spelling or a different stored value may cause an eligible user to be rejected.
Use this source when the condition should be evaluated against an available field-based value instead of text entered directly in SmartV.
| Logic | Result |
|---|---|
| AND | The Salesforce record must meet every connected condition. |
| OR | The Salesforce record must meet at least one connected condition. |
For example:
Status Equals Active AND Account Role Is Not Empty
The matching record must be active and have an assigned account role.
Alternatively:
Contact Type Equals Vendor OR Contact Type Equals Partner
The record can continue to represent either a vendor or a partner.
Add brackets when a condition set uses both AND and OR, and certain rules must be evaluated together.
For example:
Status Equals Active AND (Contact Type Equals Vendor OR Contact Type Equals Partner)
This rule permits active contacts who are either vendors or partners. Without brackets, SmartV may not evaluate the conditions in the intended order.
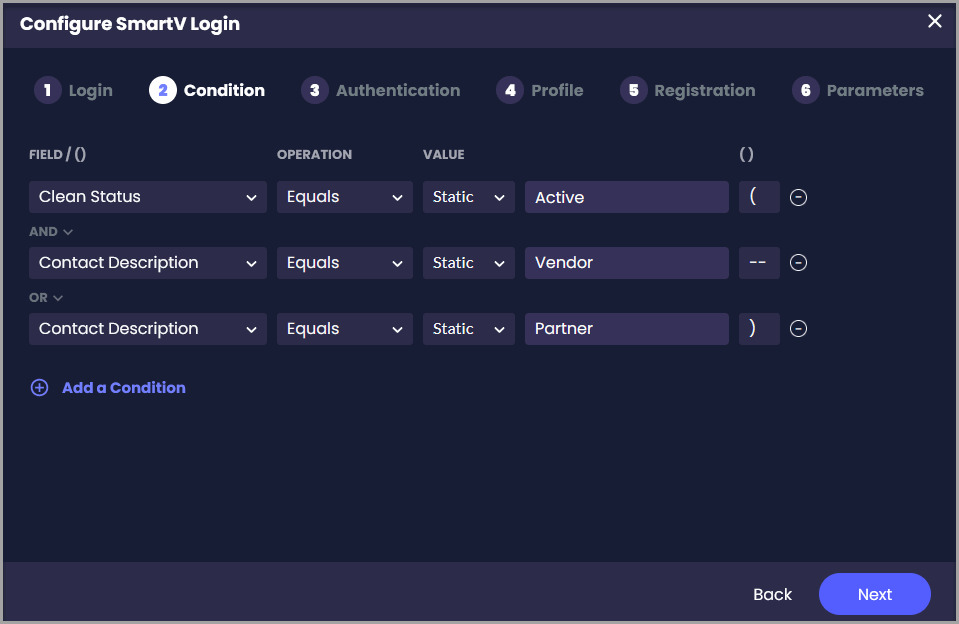
Review the Login and Conditions settings and confirm that the fields, values, and logic match your access requirements. Select Next to move to the Authentication screen.
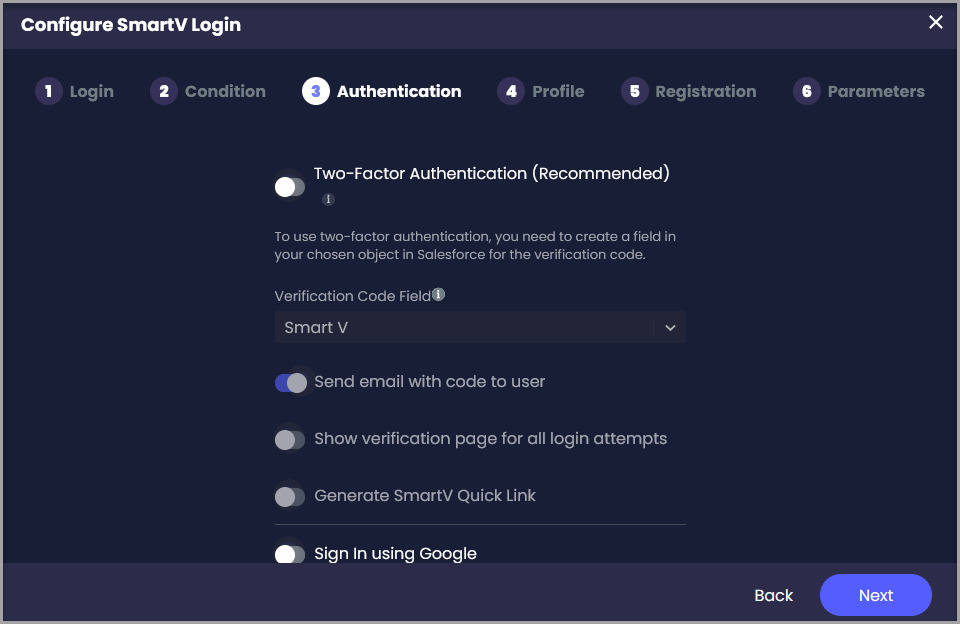
Your login and access rules are now configured. To set up SmartV to verify the identified user, see Configure SmartV Authentication.
When a user submits the login page, SmartV searches the selected Salesforce object using the configured login fields. The user can continue only when SmartV identifies one matching record that meets all required access conditions.
After a successful login, SmartV returns the configured Salesforce value to the project for use in later actions.
If a required login field is empty, a validation message appears below the field. If SmartV cannot identify an eligible record, the user sees an Invalid login message. After an unsuccessful login attempt, the user must wait 30 seconds before trying again.
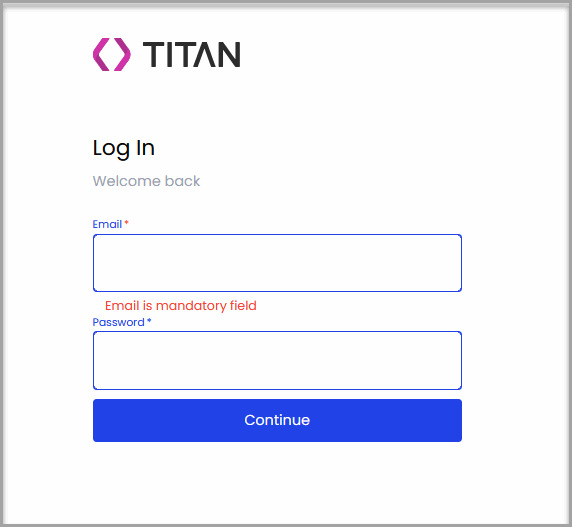
You can edit login and validation messages under Settings > Captions.
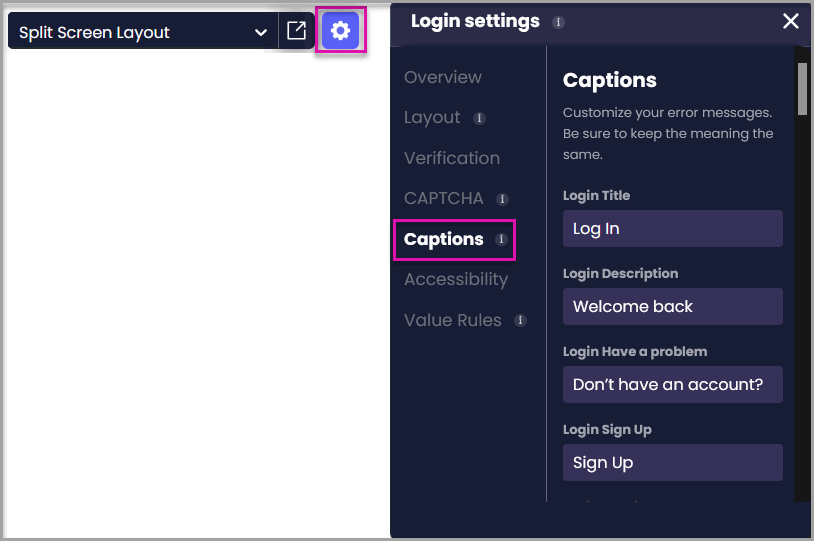
Before publishing the project, test with:
Testing both permitted and rejected records helps confirm that SmartV identifies the correct user and that the access rules are neither too broad nor too restrictive.
Confirm that every entered value matches the same record in the Salesforce object selected during setup. Check for outdated information, extra spaces, spelling differences, or values stored in another field. Also, confirm that the matching record meets every required condition.
SmartV must identify one Salesforce record. Add another login field that distinguishes the user, or correct the duplicate data in Salesforce.
Review the record’s stored Salesforce values, the selected conditions, and the AND or OR logic. Confirm that static values use the same spelling and stored value as Salesforce.
Confirm that the correct object was selected in the Login step and that the connected Salesforce user can access the required field.
Check the field selected under Value. This field determines what SmartV retains after identifying the record. Select the record ID if later project actions must retrieve or update that specific record.
No. You can leave the Email field blank if you add at least one other field that SmartV can use to identify the Salesforce record.
No. If every Salesforce record that matches the configured login fields should be allowed to continue, leave the Conditions step empty.
In most cases, yes. A record ID uniquely identifies the logged-in record and can be used in later Salesforce Get, Push, and related-record actions.
Yes. You can select a standard or custom object, provided it contains the records and fields required for login and access control.
Yes. You can add multiple login fields. Every value entered must match the same Salesforce record.
No. Password Mode only hides the characters entered on the login page. It does not create, encrypt, or manage a password.
Yes. Select Add a Condition and connect the rules using AND or OR. Use brackets when a condition set combines both types of logic.
SmartV evaluates the record when the user signs in. If the record no longer matches the login information or access conditions, the user cannot continue.
On this page